DIY Installation Tips for Bathroom Exhaust Fans
Share
Tools and Materials You’ll Need
Before starting, gather the necessary tools and materials:
- Screwdriver (flathead and Phillips)
- Cordless drill
- Utility knife
- Wire strippers
- Measuring tape
- Ladder or step stool
- New bathroom exhaust fan (sized appropriately for your space)
- Duct tape
- Metal or flexible ducting (if needed)
- Safety goggles and gloves
Step 1: Choose the Right Fan
Select a fan that matches your bathroom size and ventilation needs. Bathroom fans are rated by airflow (CFM) and noise level (sones). For small bathrooms, a fan rated at 50–80 CFM should suffice, while larger bathrooms may need 100+ CFM. For quieter operation, choose a fan with a sone rating of 1.5 or lower.
Tip: Check for Energy Efficiency
Look for models with DC motors that meet or exceed Energy Star standards to save on energy costs.
Step 2: Plan the Installation
New Installation
If you’re installing a fan where none previously existed, identify the best location on the ceiling, ideally above the shower or bathtub. Ensure there’s access to an exterior vent outlet to expel moist air.
Replacement
For replacement projects, measure the existing fan opening to ensure the new fan fits.
Step 3: Turn Off Power
Safety first! Turn off the electricity at the circuit breaker. Use a voltage tester to confirm no power is running to the fan or light fixture.
Step 4: Remove the Old Fan (If Replacing)
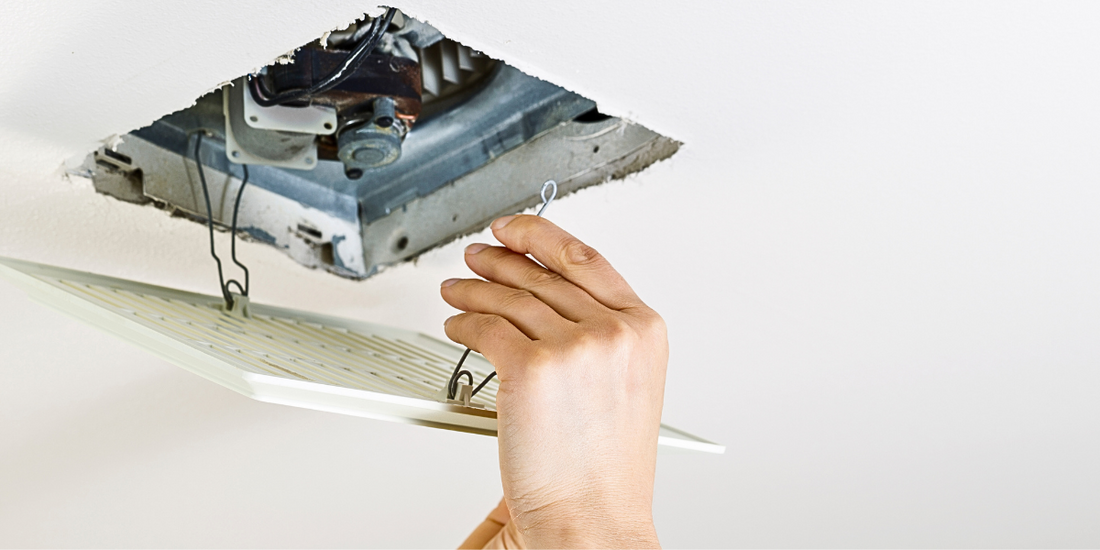
- Detach the Fan Cover: Pull down the grille cover and unclip it from the housing.
- Disconnect Wires: Unscrew the wire connectors and disconnect the power supply.
- Unscrew the Housing: Use a screwdriver or drill to detach the old housing from the ceiling joists.
- Remove the Ductwork: Detach the ducting from the fan housing.
Pro Tip: Handle Old Fans Carefully
Older fans may contain dust or debris, so wear gloves and safety goggles during removal.
Step 5: Prepare the Ceiling Opening
If the new fan is larger, use a utility knife to enlarge the ceiling opening. For smaller fans, consider patching the gap with drywall.
Step 6: Install the New Fan Housing
- Secure the Housing: Attach the new housing to the ceiling joists using screws. Many fans include mounting brackets for easier installation.
- Connect the Ductwork: Attach the ducting to the fan’s exhaust port and secure it with duct tape to prevent leaks.
- Run Electrical Wires: Feed the electrical wires through the housing’s knockout hole.
Tip: Check Manufacturer Instructions
Follow the specific installation guide provided with your fan model for best results.
Step 7: Wire the Fan
-
Match the Wires: Connect the fan’s wires to your home’s electrical wiring. Typically:
- Black or red = power
- White = neutral
- Green or bare = ground
- Secure with Wire Nuts: Twist wire nuts over the connections for safety.
Step 8: Attach the Fan Motor and Cover
- Install the Motor: Snap or screw the motor unit into the housing.
- Attach the Cover: Clip or screw the grille cover onto the housing.
Step 9: Test the Fan
Turn the circuit breaker back on and test the fan. Ensure it operates quietly and effectively vents air.
Step 10: Seal and Insulate
To maximize efficiency:
- Seal Gaps: Use caulk or weatherproofing tape to seal gaps around the housing.
- Insulate: Add insulation around the housing to prevent heat loss.
Step 11: Final Touches
Wipe down the fan cover and clean the area. Ensure all tools and debris are cleared.
Troubleshooting Common Issues
Fan is Noisy
- Cause: Loose housing or misaligned parts.
- Solution: Tighten screws and check the alignment.
Weak Airflow
- Cause: Blocked duct or improper installation.
- Solution: Inspect the duct for obstructions and ensure it’s securely connected.
Fan Doesn’t Turn On
- Cause: Wiring issue or power supply problem.
- Solution: Double-check connections and test the circuit breaker.
Benefits of Installing a Bathroom Exhaust Fan
- Improved Air Quality: Removes odors and reduces humidity.
- Prevents Mold Growth: Keeps moisture levels in check.
- Energy Savings: Modern fans with DC motors are energy-efficient.
Why Choose a Sterling Fan Bathroom Fans?
At Sterling Fans, we offer a wide range of high-quality bathroom exhaust fans designed for energy efficiency and optimal performance. With models like the Premium Compact Series SND 80, you can ensure your bathroom stays humidity and mold free year round. Explore our collections to find the perfect fan for your home.
Installing a bathroom fan is a rewarding DIY project that enhances comfort, health, and home value. Follow these tips for a successful installation, and enjoy the benefits of a well-ventilated bathroom!
Thanks for reading!
